Tuesday, November 18, 2008

Microsoft Application Architecture Guide 2.0

The Microsoft patterns & practices group has just released a beta version of Application Architecture Guide 2.0 (available for download). Lonnie Wall of RDA was a contributor for this book. I knew a little bit about this as Lonnie met with Colin Murphy and me to discuss workflow. We could not resist talking about K2 but third party platforms are not part of this architecture assessment.

I have just started to read over this and now I am enticed to make time to read the whole thing. Much of the content of this will help architects and decision makers during an Elaboration phase of a project to navigate the Microsoft stack. They have guidance on how to start architecting a solution, design patterns, best practices for layers, etc. They even get down into pro and cons of using things such as ADO.net vs. Entity, when to utilize LINQ, when to use WF and BizTalk, web application design considerations, SharePoint application, etc.

It seems pretty comprehensive so far and should be used as a starting place. There are still limitations on topics discussed in this book (for instance the limitations of Excel and InfoPath services for SharePoint are not really dived into too deeply). There are probably some other similar sorts of things in the book, but from what I know the purpose of this book was to again give a starting place.

New K2 blackpearl Best Practices Whitepaper

I know there are many out who have started doing K2 blackpearl projects and have been looking for more guidance and training. The K2 blackpearl 101 course is a good introduction, mostly for sales, but not great for a heads down developer. The K2 blackpearl Wrox book will be done really soon – I am counting down. You can find it on Amazon right now and pre-order if you wish. I have asked for some deeper dive technical training materials for developers and see where this goes.

However K2 pulled together a new K2 blackpearl Best Practices whitepaper (KB000352). It has tons of good stuff on everything from best practices on designing SmartObjects, gathering requirements, project set up in Visual Studio, logging, data field usage, rules, versioning, process sizing, exception handling, deployment, etc.

I highly recommend you give this a read.

Tuesday, November 4, 2008

WF MOSS Human Workflow Part 2 - Project

Introduction


This is the second part in a series discussing how to build human workflow with Visual Studio in MOSS. In the first article, I gave some background into considerations and assumptions that for creating a workflow in Visual Studio versus SharePoint Designer. As well, I took a deeper look into how forms work with MOSS workflows and I presented a simple approval process that will be created. This workflow will incorporate all of the basic necessities required for implementing a business workflow with WF and MOSS. One of the goals of this implementation is to make sure the implementation is easy for the business users to use, without requiring them to knowing they are using "SharePoint workflow".


In this posting I will take a deeper dive into how to prepare for the construction of a human workflow process using WF and MOSS. Specifically we will focus on the steps of how to build a project in Visual Studio..


Creating the WF Projects


In this example, I will be using Visual Studio 2008 however all of this can be done using Visual Studio 2005. Some of the steps for 2005 are different when creating the WF project and will need to install the SharePoint Extension for Visual Studio 2005.


Before opening up Visual Studio and starting adding projects, a plan of attack should be made. Nothing is more frustrating than inheriting a project from someone who did not think anything through. We want to ensure that the projects are layered, decoupled, maintainable, and scalable. There is no reason why we should create a solution just like we would anywhere. Remember all WF is a way to create even handlers that will raised in a specified order based on business rules. It is just a schedule of events. These events may call out to SharePoint, enterprise databases or access other resources across platforms.


Knowing the following will be my initiation project:

  • WFDistillery.MyProcess: Solution file that contains code artifacts for the business process.
    • WFDistillery.MyProcess.Business: Class Library project which will contain all business and domain classes used by the workflow. It is planned that Entity, part of the .NET 3.5 Framework, will be utilized.
    • WFDistillery.MyProcess.Data: Class Library project which will do any data persistence for the workflow. There may be places where LINQ is possibly used within this layer. Note at that if Entity is used in the Business library there may not be need for this library. However, it should be part of the solution because there will be other enterprise data sources that you will have to interact with down the road which Entity may not be able to work with. WFDistillery.MyProcess.Form.Request: An InfoPath Form Template project which will contain the InfoPath request form that the user will fill out. Find this under Visual C# >> Office >> 2007 >> InfoPath 2007 Form Template.
    • WFDistillery.MyProcess.Utility: Class Library project with any sort of utilities that are needed for this project.
    • WFDistillery.MyProcess.WebService: Web Service project that will be used by InfoPath forms.
    • WFDistillery.MyProcess.WF: SharePoint 2007 State Machine Workflow project. Find this under Visual C# >> Office >> 2007 >> SharePoint2007 State Machine Workflow.
    • WFDistillery.MyProcess.WF.Form.Association: An InfoPath Form Template project for the workflow association form.
    • WFDistillery.MyProcess.WF.Form.Initiation: An InfoPath Form Template project for the workflow initiation form.
    • WFDistillery.MyProcess.WF.Form.Task0: An InfoPath Form Template project for the workflow task form.

Here are some assumptions and considerations made when creating this project:

  • You will also probably want to change WFDistillery to something like Company.Department.ProcessName. MyProcess is the name of the process. You will probably want to rename this to TravelRequest, PurchaseRequest, SoftwareRequest, etc.
  • WFDistillery.MyProcess.Form.Request project was done this way so if more forms are ever added to the process, you would do something like WFDistillery.MyProcess.Form.Receiving. These forms are not the workflow forms and should thought of as simply as a piece of content. Knowing that, you can use this solution pattern for other things in SharePoint like a list item, calendar item, etc.
  • The InfoPath forms will be using web services to do all of their transactions. I really believe in trying to minimize putting any managed code into InfoPath (even if it requires more clicking). I try to treat them as simple, thin, XML based user interfaces. I have said in my blogs, if you are putting lots of .Net managed code in there; consider using ASP.net and not InfoPath. All the web service will be doing is exposing methods within WFDistillery.MyProcess.Business and WFDistillery.MyProcess.Data.
  • WFDistillery.MyProcess.WF.Form.* projects are InfoPath forms that are used by the workflow. Both the Association and Initiation forms are self-explanatory. The Task0 is the first task form for the workflow. The naming convention corresponds to the <Task0> tag in the Workflow feature files. If you project has more than one task form, you would simply add another project called Task1, Task2, etc. I will go into this deeper in a future however I have found that a best practice is to create on Task form and simply switch the views.
  • Side note, I was pretty excited to be have InfoPath Form Template project templates in Visual Studio 2008. In the past, I have put InfoPath .xsn files in VSS or had to crack them open and get all of the internal files in VSS. Now, I can do all my designing of InfoPath in Visual Studio and get all of the files in VSS for free. The only downside is I can really only do one form per project.
  • Because WFDistillery.MyProcess.Form.Request project is part of this solution, there is an assumption that request form is coupled to this solution. It would be possible to try to write something really generic where we would move all of the projects prefixed with WFDistillery.MyProcess.WF.* into a separate solution; but time is limited J.
  • It is possible to have more than one workflow defined in a WF library. The solution I am building makes the assumption that there will only be one workflow defined in this solution. If I wanted to create multiple business processes in this same solution, I would have done something like the following.
    • WFDistillery.MyProcesses
      • WFDistillery.MyProcesses.Data
      • WFDistillery.MyProcesses.Utility
      • WFDistillery.MyProcesses.Process1.Business
      • WFDistillery.MyProcesses.Process1.Form.Request
      • WFDistillery.MyProcesses.Process1.WebService
      • WFDistillery.MyProcesses.Process1.WF
      • WFDistillery.MyProcesses.Process1.WF.Form.Association
      • WFDistillery.MyProcesses.Process1.WF.Form.Initiation
      • WFDistillery.MyProcesses.Process1.WF.Form.Task0

The resulting Solution Explorer in Visual Studio will look like the following.

Creating the SharePoint 2007 State Machine Workflow Project
When creating a new workflow with Visual Studio 2008, there is a great new feature that allows you to configure your project so that you can debug your workflow from Visual Studio. In Visual Studio 2005 this was not an option. To change the debug configurations, right click the project in the Solution Explorer and select the SharePoint Debug Settings option. What this will effectively do is deploy the workflow as a feature and associate it to a list. Do not use this as a way to deploy your solution into a production environment.

When the project is created you will several files added to the project immediately. A feature.xml, workflow.xml and workflow class Workflow1.cs should be there. We will re-organize these files later on.


Coming Up
I will be taking a deep dive into how to create all of the forms that will be used for this workflow. I will be off for two weeks (11/4/08) here and will come back to this when I return.

Saturday, November 1, 2008

WF MOSS Human Workflow Part 1 - Introduction

Introduction

There are many situations where you may need to build complex human workflows within MOSS and you do not have an enterprise workflow server like to do it with. This is the first in a series of articles that will show you how to build complete human workflow solutions using Visual Studio WF and InfoPath. This series will not just focus on the nuts and bolts on how to do something; it will also give you insight to design decisions and how workflows function within MOSS.


The following topics will be discussed in this series:

  • What functionality is necessary for human workflow?
  • Introduction into MOSS Workflow.
  • Construction of a request form in InfoPath.
  • How to create a state workflow process.
  • Working with business data.
  • Archiving the request.
  • Task management, task security, delegation, and creating a task queue.
  • Reminders and escalations.
  • Automated deployment across environments.
  • How to create business process performance reporting.
  • How to create a dashboard.

Just note that products like K2 blackpearl and blackpoint make doing much of what I am about to describe as trivial. I have literally seen that this took a few weeks to pull together, get the design pattern hardened and ready for production. The same workflow when using K2 would literally take me a day. After for the first two workflows, the cost justification for K2 will be made.

Getting Started with Requirements

When getting started to build a business process there are several things you need to ask so that you have all the right information when building your human workflow. I think many of us know how to gather requirements these days, but it is worth discussing it. I had written an article on how to gather K2 requirements and after reviewing it, all of the information really holds true. Here are the questions again that I would always try to ask when going into a meeting with business users:

  • Can a business flow diagram be constructed?
    • What are the steps in the business process?
    • What are the decisions a user can make for each step of the process?
    • What role must the user have to make that decision?
    • What stakeholders are there for each decision?
    • What must occur when a decision is made?
    • What should occur when a step is not completed?
    • What are the success criteria for a process to complete? How should a process complete if success criteria cannot be met?
    • What data must be available for a user to make a decision?
    • Are there rules that affect the routing of the business process?
  • What views/dashboards are required to assess that status of the business process?
  • What reporting is required for business processes (in flight, completed, user performance, etc.)?
  • What is the user experience desired? Where do users go to complete tasks? How should users be notified when a task has been assigned?

What I will show throughout this series is how these questions will drive the actual implementation.

Workflow Design

After going through a requirements gathering process, you should be able to draw a diagram such as the following. Although this process may seem pretty simple, there is some work that needs to be done. As well, this diagram does not capture all of the usability requirements that are needed to support such a process. What this diagram does show us is the human/system steps of the workflow, the actors both system and human, actions/decisions that can be made and success criteria.

This workflow is a basic approval process where a requestor makes request, a manager must approve, then the request is sent to a queue where it is opened and finished. Along the way, the request may be sent back to the requestor for revisions. That is pretty simple.


Now the next question is how should I do this? There will be lots of things that will be done but the first step will be to create a workflow. Looking at the requirements, it becomes evident that doing a workflow in SharePoint Designer is not going to work. The problem is that the workflow is sequential and SharePoint Designer does not really work well with calling systems that reside outside of MOSS. It possible to create custom activities in SharePoint Designer to do such things as call out to a database, however this is difficult to accomplish. Plus getting to the data in InfoPath form is not clean either and processes created in SharePoint Designer cannot be deployed across MOSS environments. At this point, that option is out. The only other option would be to create a workflow in Visual Studio. Given the type of workflow this is, making this a state workflow process would be best rather than doing a sequential. The main reason is that the sequential really cannot handle the flow of this process because the process literally goes from one "state" to another "state".

As for the user interface, we are going to go ahead and use InfoPath. Really, InfoPath is not that bad if you are trying to shave some time off the delivery. There are tons of reasons why you may not want to use InfoPath and you can review those considerations by reading this. In this case, the data is really flat and I really do not have any "special" user interface rules. All we need to do is capture data and use it to make decisions. Data validation rules will be extremely simple. Plus I strive to make sure that I put as little business layer logic into my user interfaces as possible. Knowing that, there is no real good reason why I should not be able to use InfoPath.

Understanding Workflows Form and Workflow Life-Cycle

I have seen several examples out there where people spend the time wiring up a sequential workflow but do not take the time to explain the forms that you have and how you should use them. When building a MOSS workflow there are three basic forms: Association, Initiation and Task forms. There is also a modification form but that is outside the scope of this.

The association form will be displayed when the workflow is first added to a list or library. This form will only ever be displayed once and will not be seen again as workflow instances are later created for content items. The association form will be displayed after you have gone through the "Add a Workflow" page.

The initiation form will be shown when a form is started. However, this form may not be seen by a user depending on how the workflow is configured for the SharePoint list. When adding a process to a SharePoint list you have the ability to say how the workflow will be initiated. Keeping this simple, the workflow can be manually started, started when an item is created or when it is changed. The initiation form will not be displayed when a file is uploaded or submitted to a SharePoint list. It will be shown when a user manually starts a workflow.

The task form, for all intensive purposes, overrides the out of the box view of a task item in a Task List. The underpinning of everything for workflow in MOSS is a task. Whether it is a state or sequential workflow, the workflow is waiting for an event to make the workflow go to the next step in the process and nine times out of ten that is a user completing a task. The need for overriding the task form is required because based on the state of the workflow you will want to display specific information to a user. A task item is not scalable.

Now the association, initiation and task forms are NOT the request form in my opinion. This is a big point which many people do not make when talking about how to make a workflow in MOSS. Many try to embed the request form as part of the association, initiation and task forms where they are constantly trying to get the initial data from the initiation form and then loading it back into the task form. I think that is wrong approach for several reasons:

  • Association, Initiation, and Task InfoPath forms only have a short life-span. They are not a form that resides in a Form Library. Once the form has been displayed and the user submits, the form is basically gone. I like this approach well because it works with content that may not be an InfoPath request form. Calendar items, list items, pdf, etc. can be used with the workflow.
  • Both the Association and Initiation InfoPath forms can be viewed by the user once. If these forms have complex data structures (repeating information) you have the ability to access it. However, that is not the case with an InfoPath Task form. You have the ability to access data in the Task form before and after the user takes action however, you cannot work with repeating data structures. The only way accomplish this is to have the InfoPath form save the data externally to a database and then in the workflow process you will have to add more code to get that data. Just this alone, turned me off completely to trying to use the Task Form as request form as so many try to do.

The following is a diagram that should hopefully clearly explain how the forms are used in a workflow.

As you can see in the diagram, the Association form is shown only once when the form is added to a list. The Initiation Form may be shown when a workflow instance is created and the Task form will be shown for every task that is created for the workflow. The diagram shows that the Request form is not one of the workflow forms and the request form should be treated as a piece of content that is within MOSS.

Coming Up

The next thing I plan to write about is how to create a State Workflow project and start diving into how to create the InfoPath forms that will be used in the workflow.

Wednesday, October 29, 2008

K2 November 2008 User Groups

Hey – there are two user groups for K2 and both are having meeting on Nov. 11. Both seem really interesting and you can attend virtually if you like.

  • Project Server Automation – very interested to see what can be done here…
  • Event Bus by the infamous Anthony Petro!

Also note that if you miss these, Chris Geier has been posting past user group presentations.

Denver K2 User group Home and Greater Texas User Group Home

The SmartObject intro I gave last month is posted on the Denver's User Group site.

Microsoft Project Server Automation Presentation

Many companies use Microsoft Project Server to assist in the management of complex projects of all sorts. However, often these complex projects need to follow customer specific processes around project creation, issue and risk management that Project Server doesn't provide out of the box. Using a Business Process Management suite such as K2 BlackPearl, customer project management processes can be automated so that the project owners and project managers can ensure that the correct policies are enforced and are auditable. Join this presentation to see how K2 BlackPearl was extended through its SmartObject technology to allow integration with Project Server 2007 and see demonstrations of how customers might use this type of integration.

Tim Knechtel has been with K2 for 4 years as a Technical Specialist working with customers and partners to help automate their business processes. Prior to working for K2 Tim worked at Microsoft for 9 years as a Technical Specialist focusing on Project Server, SharePoint and Exchange. With over 15 years of industry experience as a infrastructure specialist and software developer Tim enjoys getting software to work as the users would expect it to. In his free time Tim enjoys spending time with his family, playing hockey and running.

Meeting Agenda:
11-11:15 Networking/Refreshments
11:15-11:30 Announcements/Intros of New people
11:30-11:45 Tips & Tricks
11:45-12:45 Technical Presentation
12:45-1:00 Meeting Wrapup


For Virtual Attendees:

Note: please keep your phone on mute until you are ready to speak.

Audio Information

Telephone conferencing
Choose one of the following:

  • Start Live Meeting client, and then in Voice & Video pane under Join Audio options, click Call Me. The conferencing service will call you at the number you specify. (Recommended)
  • Use the information below to connect:
    Toll-free: +1 (888) 296-6500

    Toll: +1 (913) 227-1219

    Participant code: 224648

First Time Users:

To save time before the meeting, check your system to make sure it is ready to use Microsoft Office Live Meeting.
Troubleshooting
Unable to join the meeting? Follow these steps:

  1. Copy this address and paste it into your web browser:
    https://www.livemeeting.com/cc/scna/join?id=72G7CQ&role=attend&pw=W6M%23pHJ
  2. Copy and paste the required information:
    Meeting ID: 72G7CQ

    Entry Code: W6M#pHJ

    Location: https://www119.livemeeting.com/cc/scna

Event Bus Presentation

This month, Anthony Petro will present an introduction to the K2 Event Bus. The K2 Event Bus provides the infrastructure and tools to allow business users to model notifications and custom actions based on events in K2 workflow processes, SmartObjects, line- of- business (LOB) systems, and single or recurring schedules. The events are configured to evaluate and execute policies independent of the context of a workflow process or LOB system activity, such as a SmartObject Create method. The policies can range from simple e-mail notifications configured in the K2 Workspace to fully customized .NET code.


Anthony Petro is the Technical Product Manager for K2. He started his professional career in the consulting world 14 years ago and has always remained focused on Microsoft technologies and solutions. He joined Microsoft in 2001 and spent the next 5 years heavily immersed in SharePoint Joint Development Programs bridging the gap between the product development teams in Redmond and the enterprise customers around the world. He was a strong contributor to the SharePoint community in its infancy focused on teaching the masses about the complexities of search and enterprise scale and using products such as K2 filling the enterprise workflow gaps of SharePoint. He joined K2 in 2006 to help bring K2 blackpearl to market through early adopter programs that spanned the alpha and beta cycles through to RTM. Anthony remains actively involved in early adopter programs for K2 blackpoint and K2 connect and planning the future releases of all product lines.


Agenda:

6:00 - 6:15 Networking/Refreshments

6:15 - 6:30 Announcements

6:30 - 7:45 Presentation by Anthony Petro from K2

7:45 - 8:00 Meeting Wrap-up


Start Time:

Tuesday, Nov 11, 2008 6:00 PM MDT

End Time:

Tuesday, Nov 11, 2008 8:00 PM MDT

Occurrence:

Recurring meeting

Meeting Lobby:

Not enabled

Attendee URL:

https://www.livemeeting.com/cc/scna/join?id=CK6G4W&role=attend&pw=F59%3EKcr

Meeting ID:

CK6G4W

Attendee Entry Code:

F59>Kcr

Location:

Audio:

Two way computer audio conferencing: Off

One way computer audio broadcasting: Off

Telephone conferencing: On

Audio conferencing provider: Other

Toll free: +1 (913) 227-1219

Participant code: 994729


Friday, October 17, 2008

K2 blackpearl 0807 Update Installer

I received word that a bunch of new updates are now available for the 0807 build…

--------------------

We have release the Update Installer (KB000320 - K2 blackpearl 0807 Update (4.8210.2.320)) and is available on the Customer Portal for download. This Update will include all patches (hence forth known as Hotfixes) to date for K2 blackpearl 0807 and can be used to update on ANY version of K2 blackpearl 0807.


This first Update Installer contains the following fixes (documented in the corresponding Knowledge Base Articles):

Monday, October 13, 2008

Deploy InfoPath as a Feature

12/11/2009 - Update for Managed Code.

1.0 Introduction
For some time now I have been pretty unhappy with InfoPath deployment. I really did not know of a way to deploy InfoPath forms other than publishing them using the InfoPath Designer. I was even more frustrated with having to go to SharePoint Central Administration to deploy a form when I had to give the form Full Trust. Sometimes I had to give Full Trust to InfoPath sometimes for making data connections. As well, I would purposely avoid adding managed code at all cost to my InfoPath forms (still if I have to put in managed code into my InfoPath form, I should use ASP.net - InfoPath and ASP.net considerations).

Well someone made a comment to my blog which showed me the light – YES you can deploy an InfoPath form as a Feature. Awesome! Totally Awesome! Some may say this is old news, but I really just wanted to share the knowledge on this one.

I am excited about deploying InfoPath as a Feature for the following reasons:

  • The InfoPath form will be deployed as a content type. I have many scenarios where I have to publish an InfoPath form to many form libraries. For instance I have business process where the InfoPath form will be initiated in one Form Library and archived in a different one. Now I do not have to go to each form library and redeploy. Since it is a content type that will be added to a Form Library, when I redeploy the form with updates, all of the form libraries are updated.
  • The form gets installed into Central Admin requiring me less clicking and less steps.
  • I can now automate the deployment of my InfoPath forms and package them up in .wsp!!! That is really where I wanted to get to.

2.0 Feature
Getting to the fun stuff first, the following is a feature that will deploy your InfoPath form for you.

2.1 Feature file

<?xml version="1.0" encoding="utf-8" ?>
<Feature xmlns="http://schemas.microsoft.com/sharepoint/"
Id="DE7C8197-4FF3-41f5-B13A-6ACB94FA0C77"
Title="New User Request Form"
Description="This feature deploys the browser enabled New User Request InfoPath Form."
Version="12.0.0.0"
Scope="Site"
DefaultResourceFile="ipfscore"
ReceiverClass="Microsoft.Office.InfoPath.Server.Administration.XsnFeatureReceiver"
ReceiverAssembly="Microsoft.Office.InfoPath.Server, Version=12.0.0.0, Culture=neutral, PublicKeyToken=71e9bce111e9429c" >
<ActivationDependencies>
<ActivationDependency FeatureId="C88C4FF1-DBF5-4649-AD9F-C6C426EBCBF5"/>
</ActivationDependencies>
<ElementManifests>
<ElementManifest Location="element.xml"/>
<ElementFile Location="NewUserRequestForm.xsn"/>
</ElementManifests>
</Feature>
2.2 Element File


<?xml version="1.0" encoding="utf-8" ?>
<Elements xmlns="http://schemas.microsoft.com/sharepoint/">
<Module Name="XSN" Url="FormServerTemplates" RootWebOnly="TRUE">
<File Url="NewUserRequestForm.xsn"
Name="NewUserRequestForm.xsn"
Type="GhostableInLibrary"/>
</Module>
</Elements>


Notes:

  • The key to this whole thing is the receiver class XsnFeatureReceiver.
  • In the Feature File the Enterprise Feature is turned on by creating an activation dependency on C88C4FF1-DBF5-4649-AD9F-C6C426EBCBF5.
  • The name of the InfoPath form is an ElementFile in the Feature.xml and is a Module in the Element.xml.

3.0 Create Project
The following is what I had to do create a project for the InfoPath form.


3.1 Visual Studio

  • I created a Visual Studio C# project. Yes, I still believe in being able to do some of this stuff from scratch.
  • In the project I added a TEMPLATE, FEATURE and a feature Folder called K2Distillery.IP.NewUserForm. In the Feature folder I put the element.xml and feature.xml. The InfoPath form will be published to Feature Form later. I explain why I do this a little farther down.
  • In the project, I deleted the default class that was created and I added the InfoPath form into the root of the project.
  • I created a file called WSP.ddf in the root of the project. This will be used to create a solution package to deploy and InfoPath Feature.
  • I then finally added a manifest.xml file to the project.
  • In the properties of the project, in the Post Build Events, I added the following which will create my deployment package when the project is built:
    cd $(ProjectDir)
    MakeCAB /D outputDir=$(OutDir) /f "WSP.ddf"

The following is what the project solution looked like when I was completed.


3.2 manifest.xml File
The manifest.xml file is used by the WSP solution package to deploy the Feature.


<Solution xmlns="http://schemas.microsoft.com/sharepoint/"
SolutionId="F9D4D78A-06AA-4625-9676-0A27E6299E05">
<FeatureManifests>
<FeatureManifest Location="K2Distillery.IP.NewUserForm\feature.xml"/>
</FeatureManifests>
</Solution>

3.3 WSP.ddf File
This file is used create the WSP file that will be deployed into SharePoint. The great thing about doing this is if there are other Features I need to deploy along with this InfoPath Form Feature, I can package them up in this single solution and all of the files will be deployed across the entire farm. For instance, if I really want to get slick, I could create a different feature to create a Form Library and then write a Feature receiver to get the content type for the InfoPath form and associate it to the Form Library on the fly.


I highly recommend that you get into this habit. It is not that hard once you learn it.

.OPTION Explicit
.Set CabinetNameTemplate="K2Distillery.IP.NewUserForm.wsp"
.Set DiskDirectory1="C:\K2Distillery\IP\K2Distillery.IP\K2Distillery.IP.NewUserForm"

manifest.xml

.Set DestinationDir="K2Distillery.IP"

.Set DestinationDir="K2Distillery.IP.NewUserForm"
TEMPLATE\FEATURES\K2Distillery.IP.NewUserForm\element.xml
TEMPLATE\FEATURES\K2Distillery.IP.NewUserForm\feature.xml
TEMPLATE\FEATURES\K2Distillery.IP.NewUserForm\NewUserRequestForm.xsn

.Delete outputDir

4.0 Deployment Steps
The next step is to deploy the solution. I have two steps.

4.1 InfoPath Deployment
You may have noticed in my project I have the InfoPath form in the root of the project and in the Feature folder. You will see what I did this in a moment.

  • Open the InfoPath form in the root of the project in InfoPath Designer.
  • Select File >> Publish:
    • To Network Location
    • In the next step, navigate to the \\TEMPLATE\FEATURES\K2Distillery.IP.NewUserForm folder.
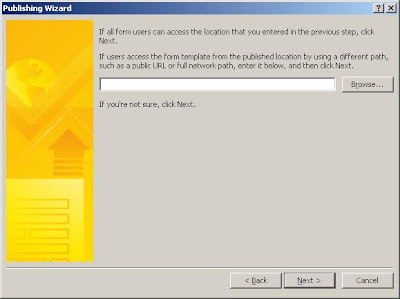
    • In this step of the publishing process, clear this text box and press the Next button. This is the reason why I have two different copies of the InfoPath form in the project. The first one is the Form I make modifications to and the second one is the form that will actually be deployed to MOSS.

  • Then Finish the wizard and close InfoPath.

4.2 Solution Deployment


  • Since the manifest.xml and WSP.ddf files have been added to the project and I have added Post Build commands to generate the WSP file, the only thing I need to do is build Project. Easy.
  • Once the project has been built a file called K2Distillery.IP.NewUserForm.wsp should have be created. The location of it is in the WSP.ddf file.
  • Then all I need to do is deploy this using stsadm.exe:

stsadm.exe -o addsolution -filename C:\K2Distillery\IP\K2Distillery.IP\K2Distillery.IP.NewUserForm\K2Distillery.IP.NewUserForm.wsp

stsadm.exe -o deploysolution -name K2Distillery.IP.NewUserForm.wsp -immediate -force


stsadm.exe -o execadmsvcjobs


  • Then finally I need to activate the Feature on the site:

stsadm.exe -o activatefeature -filename K2Distillery.IP.NewUserForm\feature.xml -url %SITEURL% -force

All of these steps could have been done through Central Administration and in Site Settings however, going down this path you will be able to create one touch deployment command files that can deploy your entire solution into a production environment.

4.3 Verifying Deployment
There are several places for you to verify that everything went well:

  • Go to Central Administration and you will see that you form has been added there.
  • Go to the site/FormServerTemplates/ and you will see the form there.
  • Go to Site Settings and you should find a new Content Type called NewUserRequestForm has been created. The InfoPath form will be set up as the document template for the Content Type.

4.4 Adding the Form to a Form Library
It is pretty common knowledge on how to add Content Type for a List, Document Library or Form Library. Well the steps have not changed. Create a Form Library, go to the form settings, go to advanced settings, allow management of content types and then add the content type for the form to the Form Library.

4.5 Promoted Fields
If you are wondering where are the Promoted Fields? Well they are there, however they are not added as a column to the Form Library when you associate the Content Type. At first I did not know where they were because I was accustomed to having promoted fields added as columns of the Form Library automatically because when I publish a form using InfoPath Designer. To add them, all you need to do is:

  • Go to the Form Library settings.
  • Scroll down to the Views section at the bottom.
  • Click on a view.
  • Check the promoted InfoPath form field which will be listed as a column. That is it.

Yes, I could probably create another Feature to do this for me too, but at this point, I need to move on J

4.6 Managed Code
Read the following posting I wrote after writing this blog.

5.0 Conclusions
Some may say you had to do just as much effort, if not more, to deploy the solution in this manner versus deploy the form using InfoPath Designer or through Central Administration. It really comes down to following a true publishing model with SharePoint. Many say if you cannot deploy something as a Feature it should not be deployed at all. I agree with this sentiment in many respects (and why I avoid using SharePoint Designer). I do agree there is a point where some manual configuration is required to deploy between SharePoint environments.

References
Deploy InfoPath Form as a Feature – Yes, I had a little help here J